With the decline of old trees and natural cavities, many bird species struggle to find a place to nest. Installing a nest box is a simple yet impactful way to offer them a safe refuge and gives you the chance to observe wildlife up close.
But beware : a proper nest box is more than just a wooden box. It must meet the specific needs of your local species. Here’s everything you need to know to build, choose, and place a nest box properly.
Why Install a Nest Box?
Many cavity-nesting birds (such as chickadees, nuthatches, woodpeckers, and swallows) are seeing their populations decline, partly due to the loss of natural nesting sites. Installing well-designed nest boxes can truly help reverse this trend.
Some species, like owls, begin nesting as early as February. Others start looking for suitable nesting spots at the first signs of spring. That’s why March is a great time to prep your boxes: clean them out, make repairs, install or relocate them.
Not all birds use nest boxes.
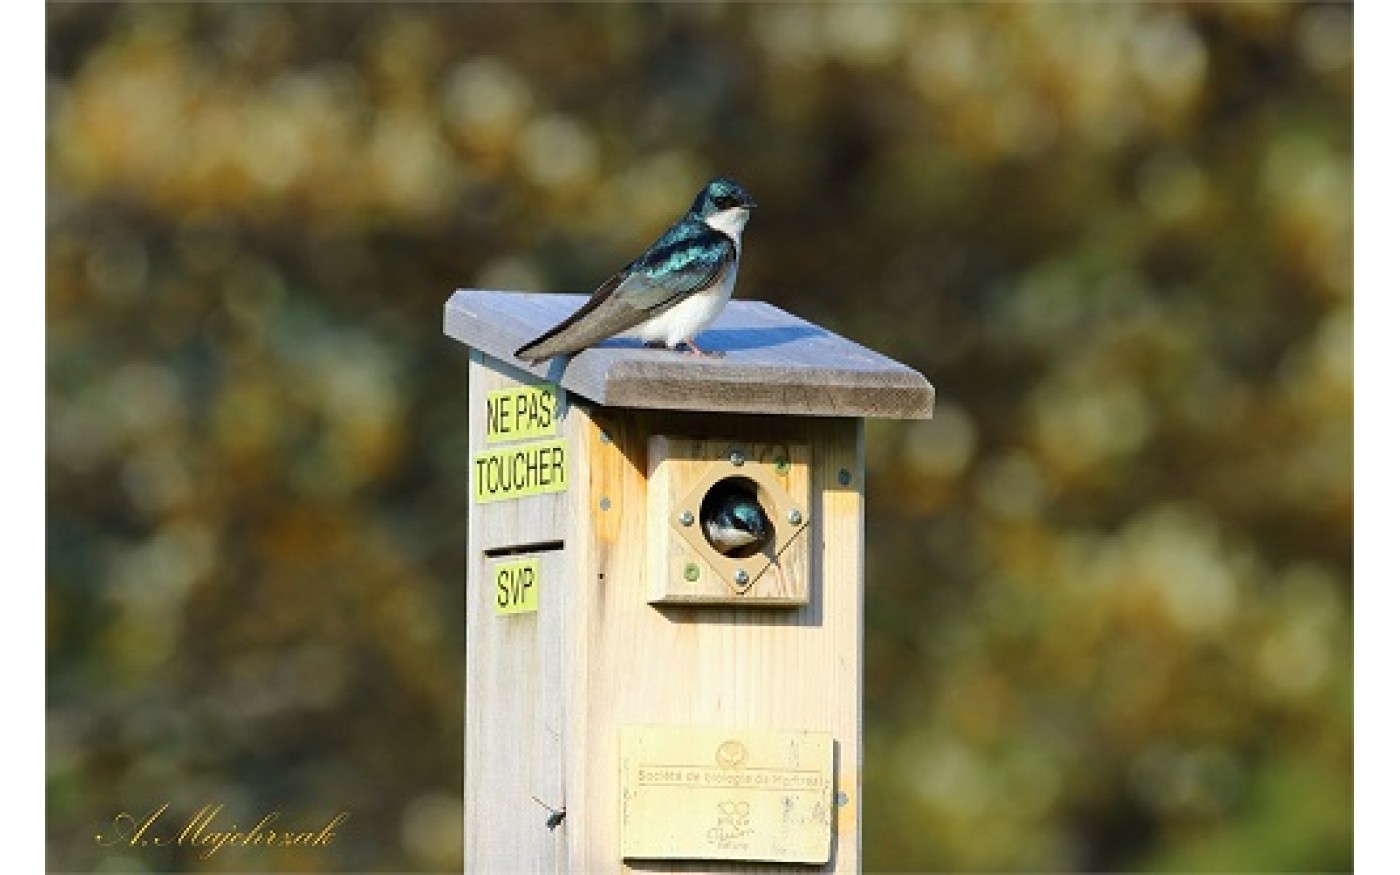
Before you install a nest box, it’s essential to know which species you’re trying to attract. Only some birds use cavities for nesting: chickadees, nuthatches, house sparrows, woodpeckers, owls, and a few others. Other species, like robins or blackbirds, prefer more open or hidden nests in shrubs or trees.
How to choose or build a proper nest box must be adapted to the species you're targeting.
Key features include :
- an entrance hole size: which determines which birds can access the box.
- Interior dimensions: each species needs a specific volume.
- Hole height from the floor: too low and it increases predation risks.
- Materials: use untreated, rot-resistant wood (like cedar or pine).
- Weather protection: keeps the interior dry and warm.
- No perch: unnecessary and risky (it helps predators and encourages chicks to fledge too early).
- Ventilation & drainage: essential to avoid moisture buildup which can be fatal to chicks.
- Easy to open: for annual cleaning and inspections.
Tip: avoid generic boxes sold in big stores (they often suit invasive species like starlings or house sparrows better than native birds).
Placement: the key to success.
Like in real estate, location matters. Follow these simple guidelines:
- choose the right habitat for the species you’re targeting (e.g., chickadees = wooded yards or hedges / bluebirds = open fields).
- Mounting height : typically 6–15 feet (1.8–4.5 m), depending on the species.
- Orientation : ideally facing east or southeast to avoid prevailing winds and afternoon sun.
- Mount securely : to a post or tree trunk, with predator protection if possible.
- Keep away from feeders : these attract other birds (and potential predators).
- Prevent invasives : install boxes at the right time (not too early) and consider blocking the entrance hole in winter.
Maintenance
A simple but crucial step each fall, or at the very latest, early spring, empty and clean out the nest box to remove old nests, parasites, mold, or fungus. Use cold water with a bit of bleach only, no soap or chemical cleaners, as these can harm birds.
In winter, an empty nest box can double as a roosting shelter for small birds. In conclusion, installing a nest box is a small act with a big impact.
When designed and placed properly, nest boxes can make a real difference for local bird populations (and offer you the joy of watching wildlife right from your window). It’s a beautiful way to support biodiversity with care, curiosity, and respect.